Since the COVID-19 ban on gatherings of people more than 10 people, churches have moved to house churches and live-streaming. I assisted my church in getting setup to live-stream our services. Some people have asked about how to do this, so here’s a basic guide. (Note: this is designed for fairly low-tech churches.)
(note: this is a work in progress. More images coming soon)
Camera:
The easiest way to achieve good sync between sound and picture is to feed the audio directly into the camera. This insures that picture and sound are synchronized and both contained in the HDMI feed. It also saves you from having to deal with delaying one or the other in software.
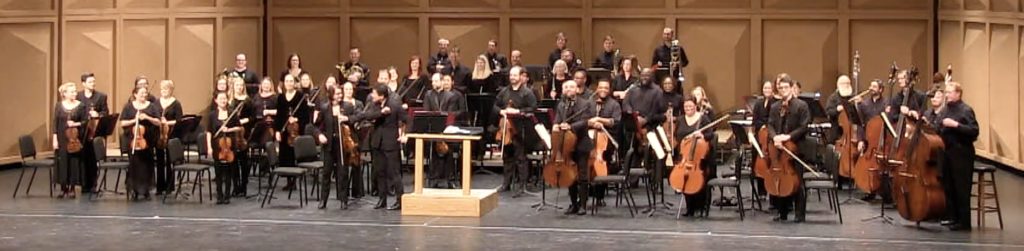
This requires a camera with professional line level inputs. I used an older Canon XA-10. Canon, JVC, and Sony all make suitable models in the $1200 – $1400 range.
For ease of cabling, keep the camera close to the streaming computer and your audio mixing console. HDMI can only run over short distances.
Sound:
Sound is vitally important. Do not rely on the built-in mics of camera – take a feed from your audio console. This will give clear, intelligible speech. For music you will probably need to add mics for things that are largely acoustic and not typically amplified (e.g. drums). Or a pair of room mics. Just make sure these are close to the musicians (not by the audio console) or else the delay will be distracting.
On your audio console, use a separate auxiliary mix for the stream feed. Start with post-fader sends, with each at unity gain. This will make the mix match the sanctuary sound – even as the audio engineer moves faders. You can also spread things out in stereo (assuming your PA is in mono as it should be). Since there will be no congregation, you can run the PA quieter than normal if needed and the audio engineer can focus on the livestream mix.
Connect the line level output of the auxiliary mix to the line inputs of your camera.
It is a great idea to record a rehearsal and listen back and make modifications to the livestream auxiliary send.
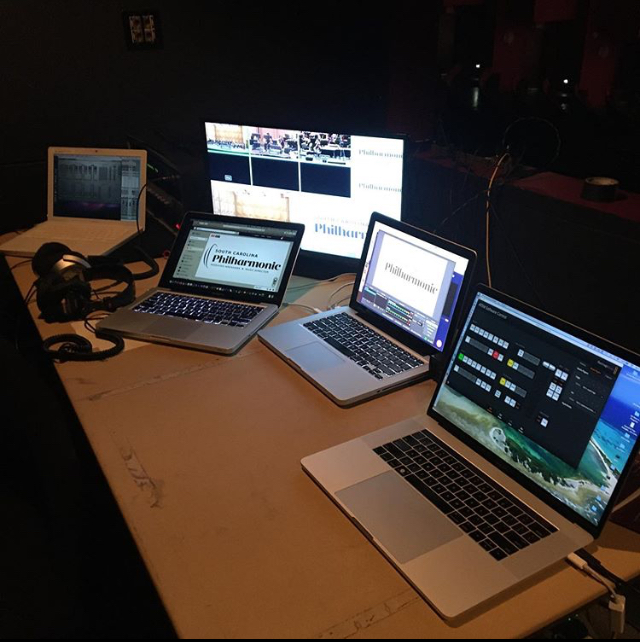
Computer interface
There are many ways to get the picture (and sound) into the computer. Blackmagicdesign makes several. If the camera output is HDMI, a simple HDMI to Thunderbolt interface works (BMP UltraStudio Mini Recorder). Or you can get something like the web presenter, which mimics a webcam. But we’re using OBS software for this as well as other things (more below).
Download and install the driver. Connect your camera to your streaming computer via this interface.
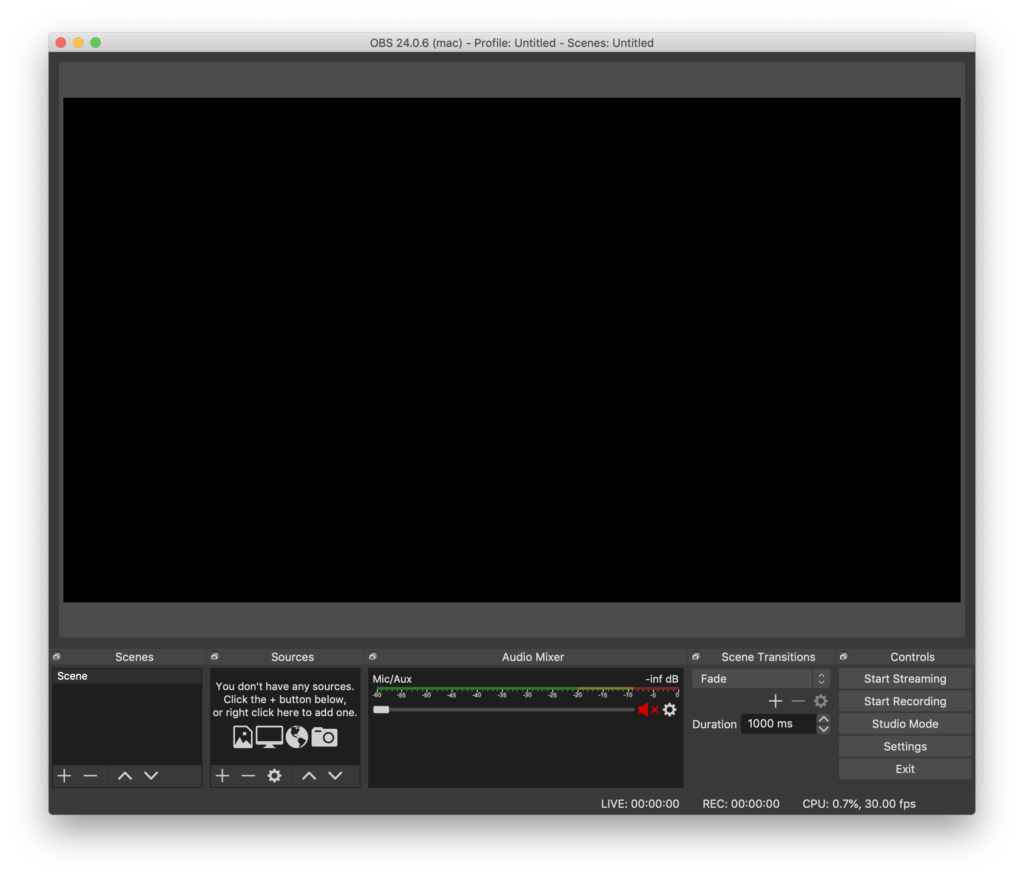
OBS:
OBS ( is open source cross platform software that is extremely versatile. It can gather together many sources (camera, ProPresenter, Image files, etc) and stream them to one destination.
Restream.io
If you’d like to stream to more than one destination, sign up for an account with Restream.io. In your reestream account, sign into all your services (FacebookLive, YouTube, etc). Then set the OSB stream settings to Restream.
OBS setup
In the Stream section of OSB, add a device with the ‘+’ button.
In the pop-up, select your device (e.g. Blackmagic Device). This will not show up if you have not installed the driver.

Choose the Device (i.e. UltraStudio Mini Recorder) and select the video input (i.e. HDMI). You should see video in the OSB window. Use the red outline handles to size the video on the ‘canvas’ (if you want to make it smaller for PiP, for instance)
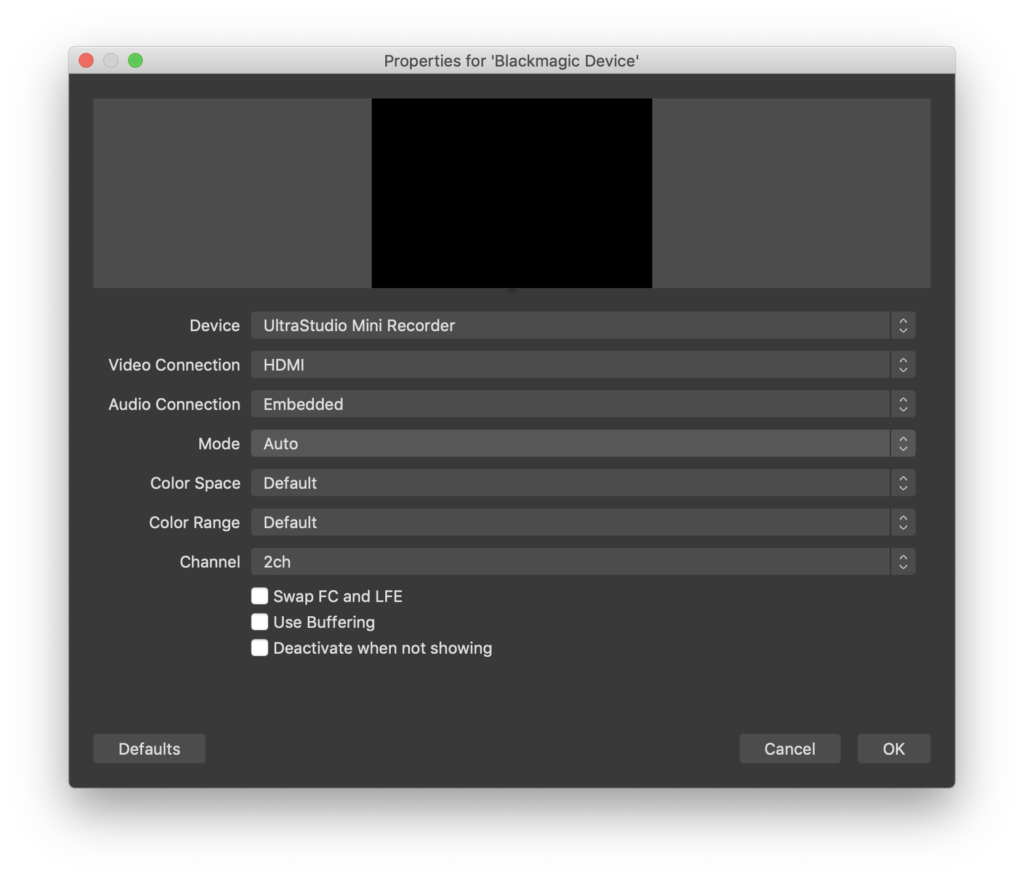
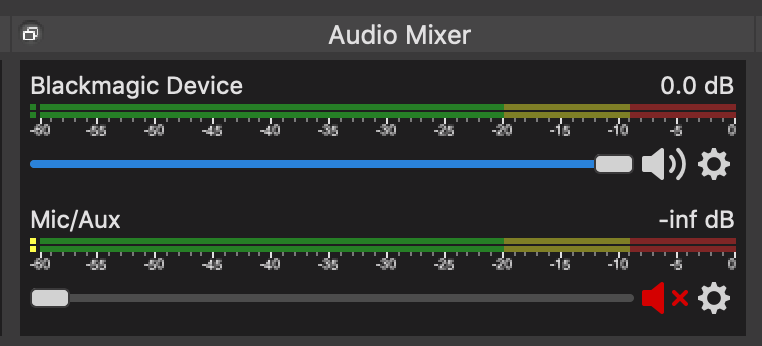
Open the settings and choose the audio tab. Set one of the Mic/Aux audio to your device. All the rest should be disabled. The video tab allows you to set the screen size (resolution) of the canvas and the output of the stream. We’ll get to the stream tab later.
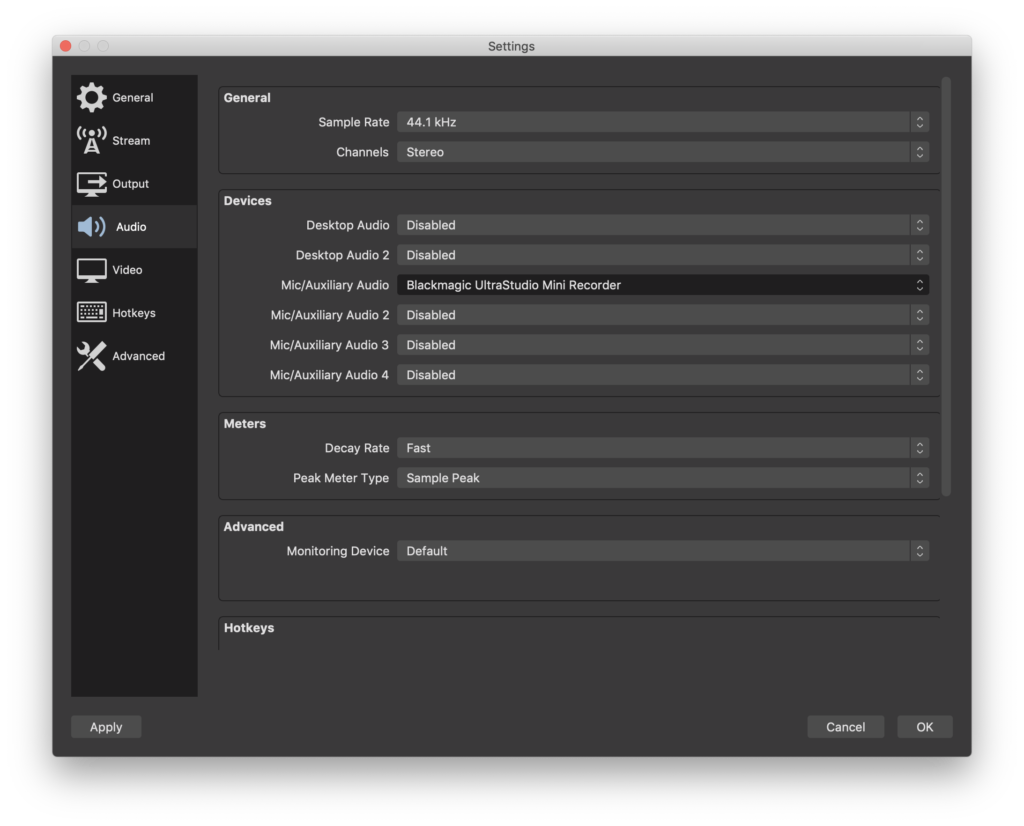
In the audio mixer at the bottom of the canvas, be sure to mute the Mic/Aux. This will prevent your computer’s built-in mic from going out on the stream.
Stream setup
Stream setup to various services is similar. I’ll explain Facebook Live streaming. On your church’s FB page, select Live Video. At the top choose Connect. Be sure to select “Use a secure connection” and “Use a persistent key”. Copy the persistent key to the clipboard with the copy button. On the right you can name, schedule and change settings for your stream.
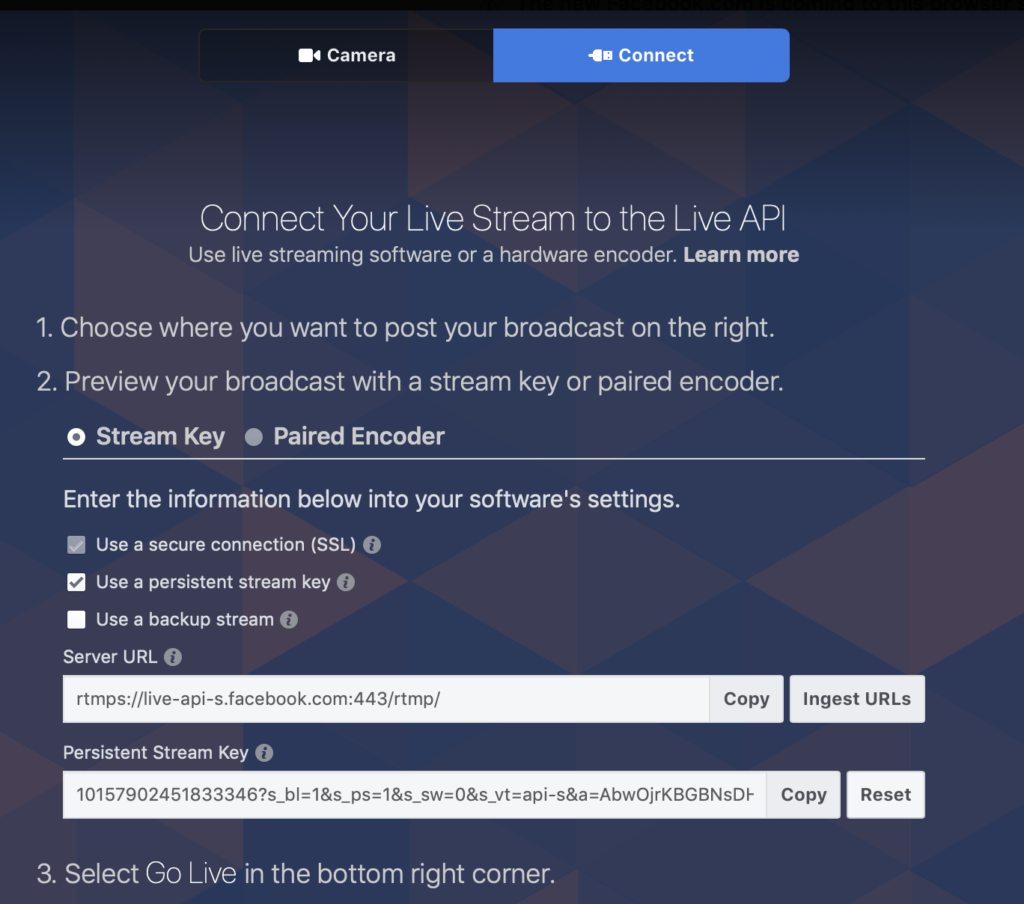
In OBS settings, go to the stream tab. Choose your service from the pop-up and paste the stream key that you copied in the previous step.

In the bottom of the OBS canvas, click start streaming. Go back to Facebook and you should see some stream specs across the bottom. Click Go Live in the bottom right,
Lyric/Slides
OBS provides many options for combining live video with lyrics/slides. We use ProPresenter, but as long as the software is on the same computer and outputs to a second display any software will work. Lyric overlay requires a solid color background. White text on black background works best.
Add another source – this time Display Capture. In the display pop-up, choose the second display.
If you want to have Picture-in-Picture, select the video source and use the red handles to make it smaller and place it where desired.
If you want overlay, right click the Display Capture source and choose filters. Add (using the ‘+’ button) a Color Key filter. Select ‘Custom Color’ Key color type and select the color to match your slide background (black in this example)

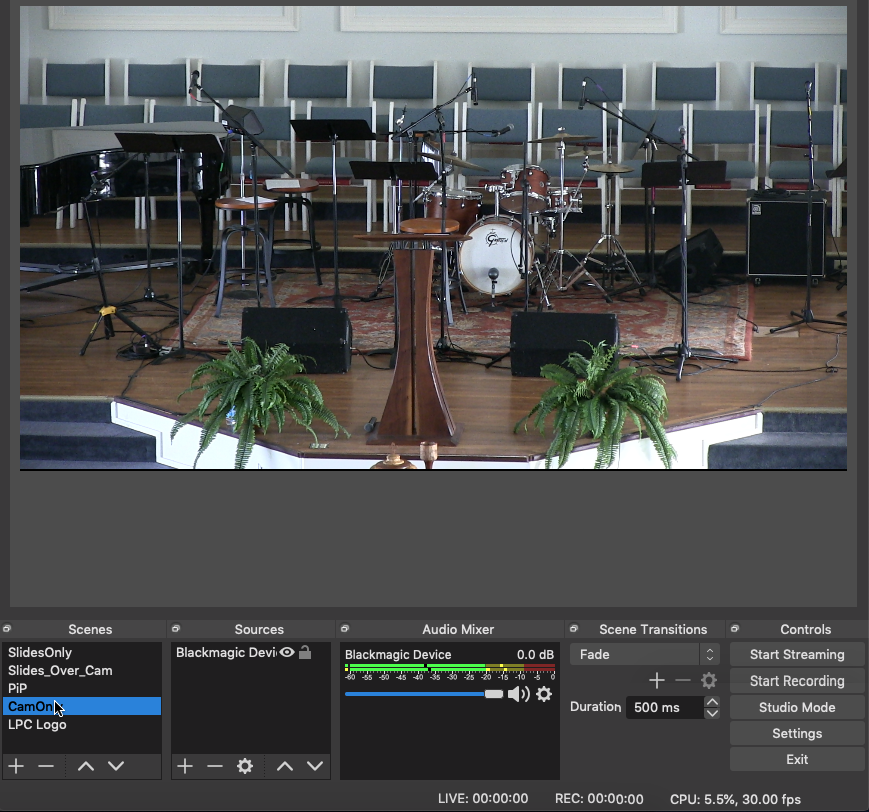
OBS allows you setup various ‘scenes’. Each can have it’s own arrangement of sources. For our church I created 5:
- Camera only
- Slides only
- Slides over-layed over live camera
- Picture in picture (small video in the corner of full slides)
- Logo only
The order of inputs in the source window determines which appears in the front. Use the up/down arrows to change the order. Select a source to modify it’s size, position, and crop.
Important! – Even if you don’t need the live video feed (as in the slides only scene) be sure to include it and just move it to the background. It is the source of the audio, so you definitely don’t want it to disappear.
Camera Only 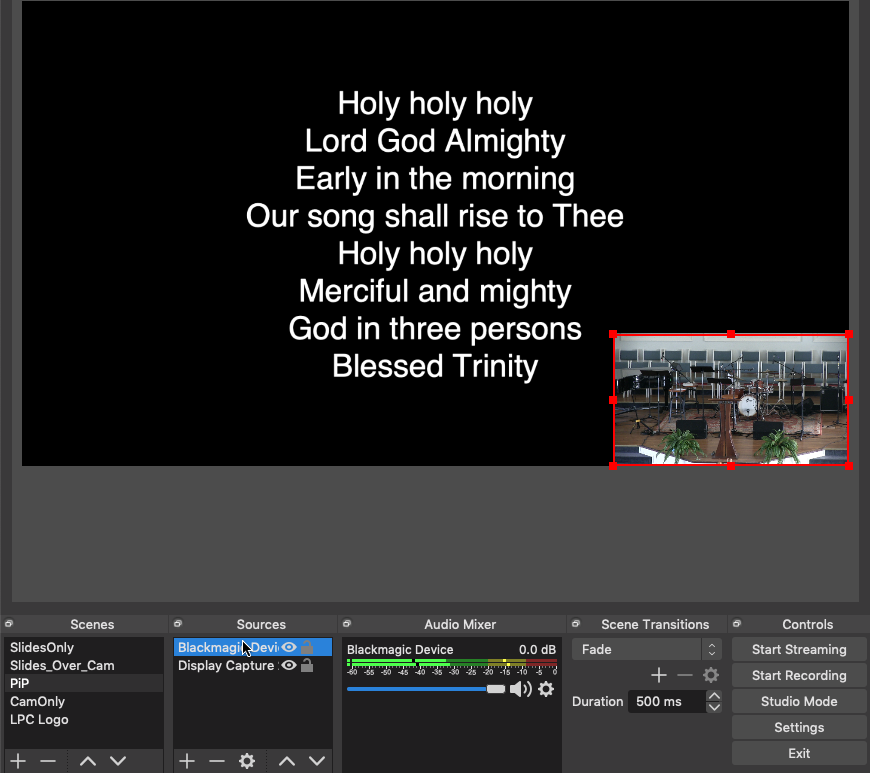
Picture in Picture 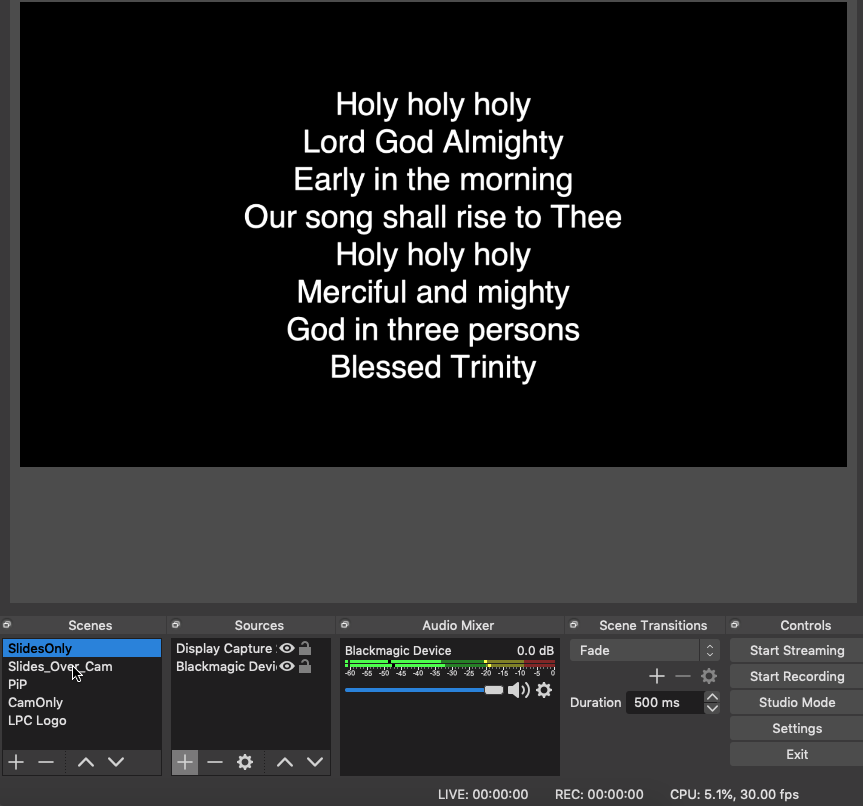
Slides Only 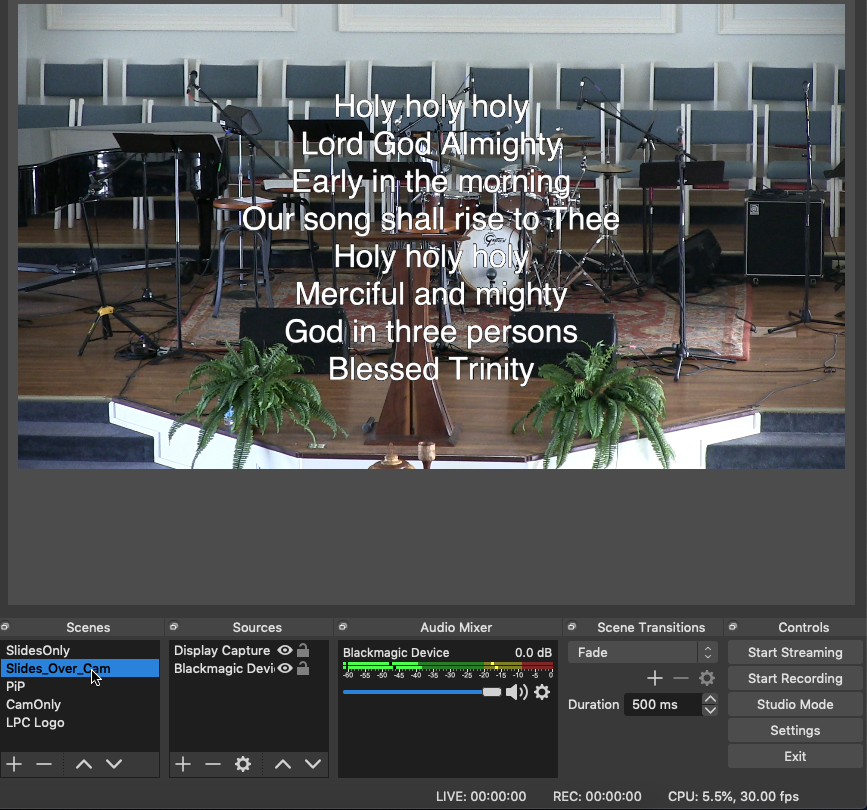
Slides over Camera